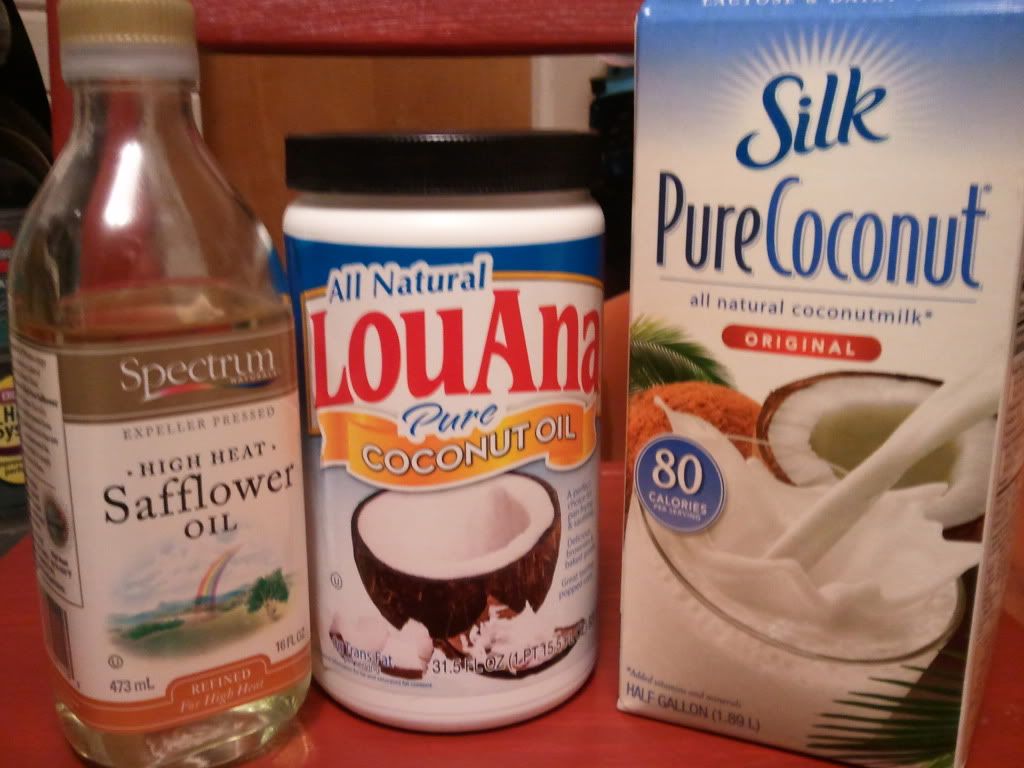
December 17, 2012

DIY: Coconut Rum Sugar Scrub for Lips and Body


You will need:

Coconut oil
Natural  Cane Sugar (or fine grain for sensitive skin)
 Safflower Oil (or other light oil)
Honey
Imitation coconut extract
Imitation rum extract 
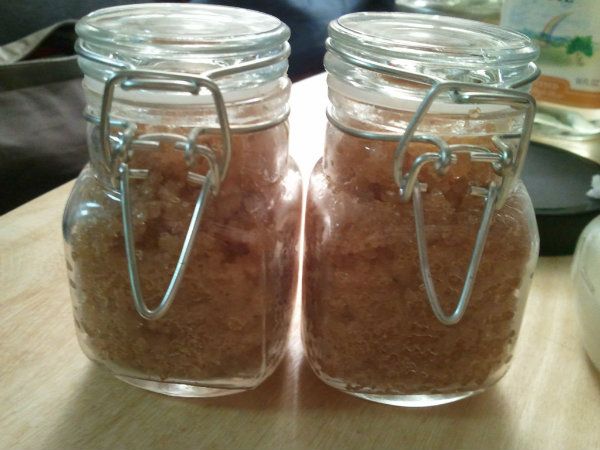
Glass jars 

* Amounts will depend on the sizes of your jars


For Body Scrub:

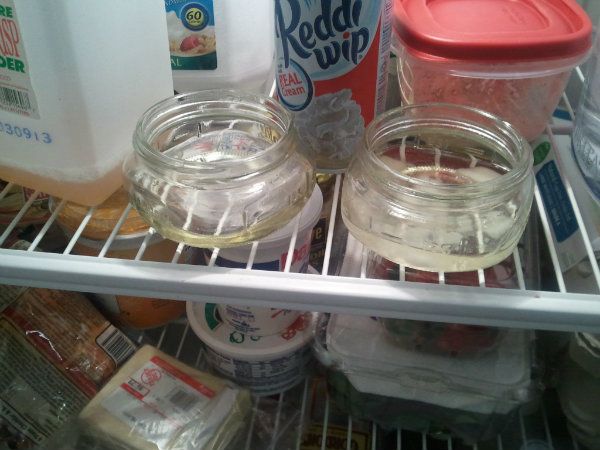
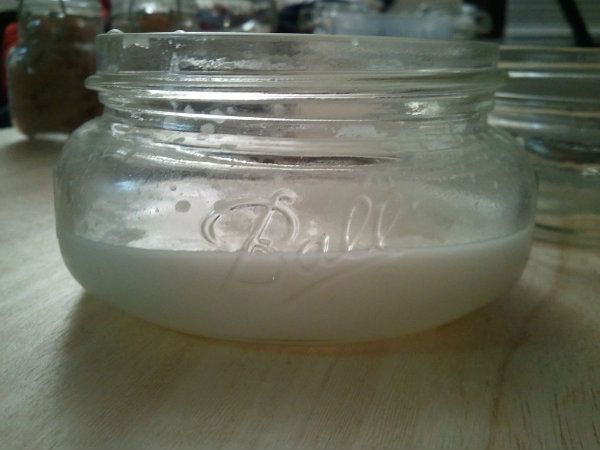
1. Scoop a few spoon fulls of coconut oil into glass jars. Estimate the amount so that it will fill jars up to half way. 

2. Melt the coconut oil inside of the jars (I microwaved each for around 15 seconds) so that the surface will be smooth.

3. Let the coconut oil cool and solidify in the fridge for 10-20 minutes. 

4. In a separate container, pour in 1-2 cups brown sugar (again - depends on size of your jars). Add in about a tablespoon of safflower oil and a teaspoon of honey. Mix well.

5. Add in a teaspoon of coconut extract and teaspoon of rum extract. If the scent is too light, add more.

6. Mix well. If you find the mixture to bee too liquid, add more sugar and mix. 

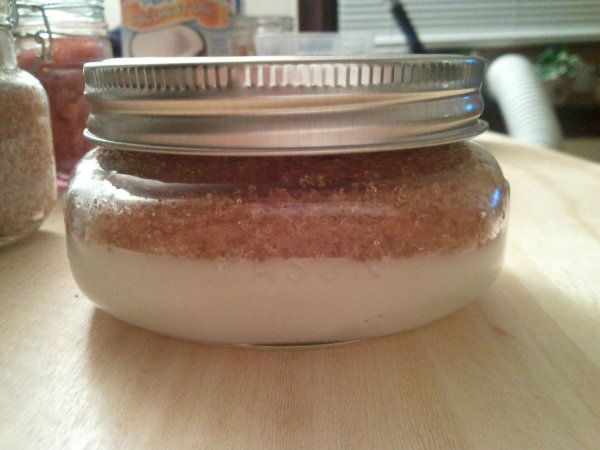
7. Scoop mixture into the jars on top of solidified coconut oil 

8. Store at room temperature or in the fridge. To use, mix coconut oil and sugar mixture together before using as a scrub. If stored in the fridge, you will probably have to heat up the contents before mixing. 


For Lip Scrub: 

1. In a bowl, pour in as much sugar as you think you will need (I used around a cup). 

2. Add a small amount (around teaspoon-tablespoon) of melted coconut oil to sugar and mix.

3. Add tea spoon of honey and mix. 

4. For scent, add in a dash of coconut extract to equal parts rum extract.

5. If you find mixture to be too watery, add in as much sugar as needed until you get the texture you prefer. 

6. Scoop the sugar mixture into small jars for storage. 


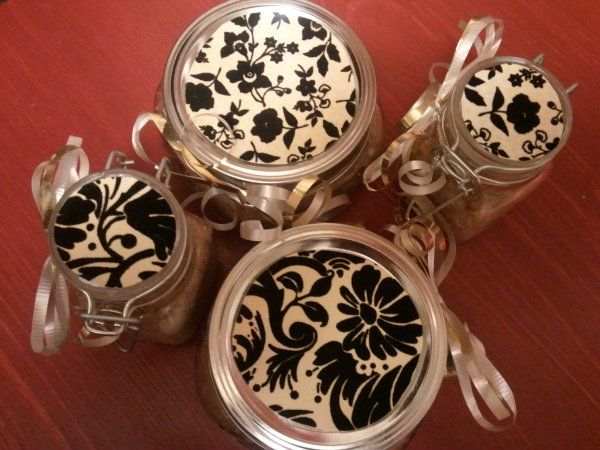
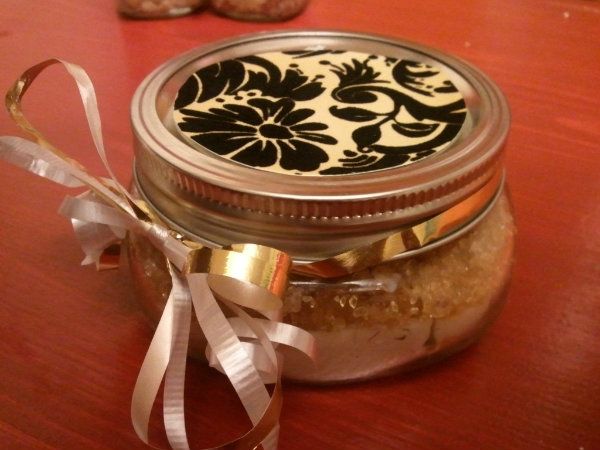
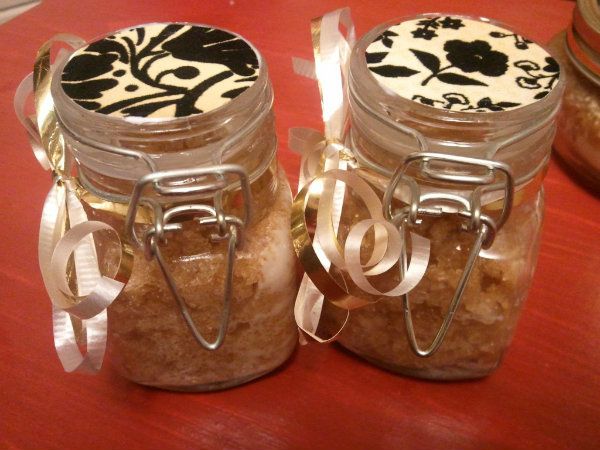
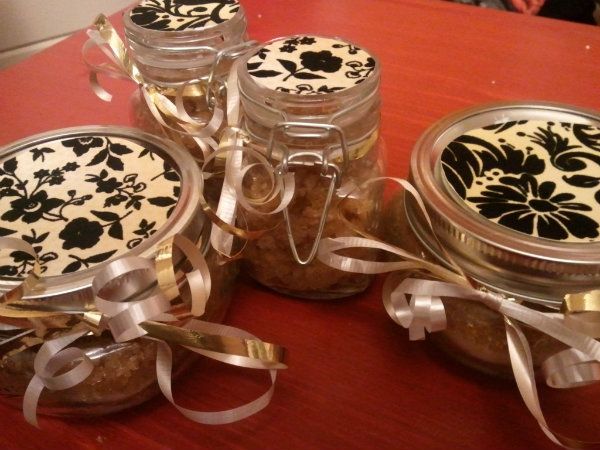
For Pretty Packaging:

1. Measure out the shape and size you need to cover the lid of your jar and cut out the shape from pretty paper. You can also buy jar labels from craft stores that are already made. 

2. Use ribbons to tie around the lid. Perfect for holiday gifts! 


December 16, 2012

Christmas Nails


Yesterday was my last day of class which means the Holidays are coming soon. I'm still obsessing over the gold Sephora sparkles I bought on Black Friday so of course I had to use it again. These nails are a toned down Christmas theme. I like that they're a bit muted so they don't stand out a ton but are still festive at the same time.  I used a crimson/terracotta red by American Apparel called Pinto and a dark shimmery green by Sally Hansen's Insta Dri line called Jumpin' Jade for the accent nail. 


Left to right:

Pinto by American Apparel
The Golden Age by Sephora (by OPI)
Jumpin' Jade by Sally Hansen Insta Dri 


December 13, 2012

How I Straighten 4A Hair

Check out my updated method for straightening 4A hair 
using bantu knots here!


I don't straighten my hair too often because I get scared that every time I straighten it, my ends will break off. I like straight styles but I try to keep the use of my straightener to a minimum which I am hoping will help it to grow. When I do straighten it, I try to deep condition the night before to give my hair a boost of moisture and elasticity to help prevent breakage. 

I'm not picky with deep conditioners but I happened to have these ingredients in my house and so these are what I used to make a safflower coconut oil mask. This is very oily, so if you don't use shampoo, I would suggest leaving out the oils and just using coconut milk alone or oat milk instead. I heated up my ingredients in a bowl so that they would mix and so they would soak into my thirsty hair. I find that pre-straightening masks help prevent as much breakage from happening the next day. I also find I don't shed as much in the shower and when detangling.


Pre-Straightening Hair Mask:


Safflower Coconut Oil Mask Recipe:
1/2 C. coconut milk
1 Tbs. Safflower oil
1 Tbs. Coconut oil


My Regimen & Products: 


Top:
Over night hair mask (Safflower coconut) 

Bottom, left to right:
Trader Joe's Nourish Spa Shampoo
Trader Joe's Nourish Spa Conditioner
Giovanni Direct Leave-In Weightless Moisture Conditioner
Giovanni Vitapro Fusion Protective Leave-In Treatment
Smooth N Shine Polishing Instant Repair Hair Polisher


My 4-Step Straightening Routine:


1. Hair mask


To apply the mask, I separate my hair into four sections. I apply the mask to each section and twist into bantu knots as I go to keep my hair less tangled. I end up with around 8-10 twists (2-3 per section). I cover the hair with a plastic bag and then slept with the mask in. 


2. Shampoo & condition


The next morning I shampoo and condition using Trader Joe's Nourish Spa shampoo and conditioner. Since the mask I used is extremely oily, I shampoo twice. I leave the conditioner in for about 5 minutes and then rinse it out. After I rinse, I add less than a quarter sized amount of conditioner back into my hair and scrunch it through. I don't rinse this out entirely which helps with detangling later. (Freshly washed hair above). 


3. Blow out


After my hair is washed, I dab with a towel to remove excess water and then part into four sections for detangling. I apply a dime sized amount of the Giovanni Direct Leave-In to each of the four sections and come through with my Denman brush from ends to roots.

I keep my hair divided into 4 sections for blow drying, too. Before blow drying, I spray on a few pumps of a light non-oily heat protectant (Giovanni Vitapro Fusion Protective Leave-In Treatment) onto each section since I use the high heat setting. I split each of the 4 sections into 2-3 smaller sections and blow dry each section, clipping straight hair out of the way as I go. 

I don't have a comb attachment to my blow dryer so I use the Denman brush to smooth out my hair while I blow dry straight. If I had a blow dryer with a comb attachment, I'd use that. 


4. Straighten 


After blowing out my hair, I part into 4 sections. I apply a dime size amount (very little) of a heat protecant serum (Smooth N Shine Polishing Instant Repair Hair Polisher) evenly onto each section. The cones in this product help smooth and shine the hair making the straight style last longer. 

I work with a small strand of hair at a time, clipping back the rest of the section out of the way. I brush through gently with my Denman brush (or a small comb) and then run my straightener over twice. If I need to, I comb through again and re-straighten. After I finish straightening the section, I leave the hair out and move on the other sections until it's done. 

The way my hair is cut is really layered so I accentuate the layers by rolling the straighter under as I pull which adds some texture and volume. 


Results:


Check out my updated method for straightening 4A hair 
using bantu knots here!


December 12, 2012

Tiny Expo: Indie Holiday Arts & Craft Fair

Over the weekend the boyfriend and I walked down to Ann Arbor's 2012 Tiny Expo. It's an annual indie arts and craft fair featuring the work of local artists. I had never heard of the event before but I'm glad I went this year. The show was tucked away on a street off of main (220 Felch Street) at the Pot & Box and Metal warehouse. More details about location and artists can be found on the Tiny Expo 2012 web page here. I bought my sisters these lace bracelets that I loved from White Owl. There was a ton of neat stuff. Here are just a few pictures of the treasures I found.


SIMPLY JESSI
"Handmade for children big or small."
www.simplijessi.com


POT & BOX
"Fresh floral design & horticultural decor."
www.potandbox.com


WHITE OWL
"Lace jewelry and statement jewelry."
www.whiteowl.etsy.com

December 8, 2012

U of M Winter Craft Fair


Yesterday I had a table at the University of Michigan's Winter Craft Fair. It turned out to be a very successful event with a great turn out! An A Capella campus group came and sang holiday music and there were around 10-14 different artists with table set ups and very neat stuff. 

For those of you looking to browse through more Latidoe items, I'll be posting more items onto my etsy shop as soon as I find the time to make more things -- hopefully by next weekend. 


The Display:


The newest items I sold were these cloth covered hair pins. I was skeptical at first whether or not people would go for them because they are so small but people seemed to really like them. I'll definately be making more of these and I'll add these to etsy as well:


The other students with tables had a pretty wide variety of items and a lot of interesting jewelry. One girl was also selling clothing handmade by local women in Liberia. I bought this necklace from a girl selling handmade jewelry -- she had beautiful necklaces, earrings and bracelets. I knew I was going to walk away with something...


November 30, 2012

Dark and Lovely Jet Black Hair Dye


When I first cut off my hair I told myself I wouldn't get it dyed until it grew at least 10 inches. That didn't happen at all. I dyed my hair before the Summer sometime in April to a brown a few shades lighter than my natural color. By the time Fall rolled around, my darker roots had grown in and I wanted to dye it for the upcoming Winter. I debated between L'Oreal (which I usually use) and Dark and Lovely and decided to go with Dark and Lovely because the formula is made with dry hair in  mind. 


Price: $7.99 at CVS

Color: The color was true to the picture on the box but starts fading after a few weeks (I shampoo once a week). At first I didn't perceive it as jet black. I saw it as more of a natural black, but in pictures it does look very dark black. My hair is fairly thick so I might have been better off using two boxes just to make sure all my strands were equally saturated. If you have long hair, I would definitely recommend two boxes. 

Hydration: This did not leave my hair feeling too good. I didn't expect my hair to feel great because hair dye is hair dye, but I didn't expect it to feel as dry afterwards because Dark and Lovely is supposed to be made for dry hair. Compared to the dye I normally use (L'Oreal), whatever hydrating properties were in this dye did not feel as nourishing. Next time, I'll probably stick with L'Oreal. 

Damage: Even though this product didn't leave my hair feeling very soft, I haven't noticed any damage after its use at all. Overall, my hair is just as healthy as it was before I dyed it and does not break or shed any more than it ever has. 

Time: Total application time was around half an hour. It took about 10 minutes to apply and then around 20 minutes to let sit. 


Results:


Before                              After

November 28, 2012

Sephora Sparkles


I'm actually obsessed with this color combination. I especially love the gold glitter. I was in Sephora for forever with my little sister and best friend trying on every single sparkle polish they had on Black Friday. My favorite was Sephora by OPI in The Golden Age. I layered two coats of this over two coats of Sally Hanson Hard as Nails Xtreme Wear in Blue Me Away -- a bright obnoxious (in the best way) blue. I'm in love with the results! The sparkles are more glittery than they appear in the picture. They're perfect for the holiday season so I thought I'd share:


November 26, 2012

Herbal Essence Hello Hydration Moisturizing Conditioner


When I visited home for the holiday weekend, I found Herbal Essence's Hello Hydration Moisturizing Conditioner in my sisters' shower and decided to try it out. I've heard good things about this product, but have never been a huge fan of Herbal Essence. I've always thought of Herbal Essence shampoos and conditioners more like hair perfumes than hair treatments. Good smelling hair is never a bad thing, but for my dry hair, just not enough. 

I didn't try out the shampoo, but I was pleasantly surprised by the conditioner. It's not as thick or heavy a formula as my current conditioner (Trader Joe's Nourish Spa) I don't think, but it's thicker than I expected for a brand typically marketed to "normal" hair types. It's also super moisturizing and has great slip. I let the product sit on my hair for about 5 minutes in the shower before rinsing it out. My hair was softer and far easier to detangle. 

Price: $7.99 at CVS for 23.7oz bottle

Smell: Fruity and floral with coconut and orchid extracts 

Consistency: Medium/thick

Detangling power: Super

Ingredients: 
Water, stearyl alcohol, behentrimonium chloride, cetyle alcohol, bis-aminopropyl dimethicone, coconut extract, orchis mascula flower extract, corn silk extract, fragrance, benzyl alcohol, disodium edta, sodium hydroxide, methylchloroisothiazolinone, methylisothiazolinone, blue 1

Likes:
I love this product's consistency, slip and instant moisture. It does everything I would want my conditioner to do, giving my hair plenty of elasticity before styling. It's also fairly inexpensive -- under $10 for over 20 ounces.

Dislikes:
I don't care much for the smell -- it's a bit strong and not as coconutty as I thought. The ingredient list is also not very impressive. Even though it is sulfate free, it has a couple different alcohols in the first five ingredients which can dry out hair over time. Personally, I don't mind cones because I still use heat, hair dye, and a lesser-evil sulfate shampoo to remove any buildup from cones. If you avoid sulfates and cones entirely, then this conditioner may not be for you. 


September 4, 2012

Simple Succulent Centerpieces

Succulent Centerpiece, Rustic, Great For Weddings, Cocktail Parties And Other Special Events, Housewarming Gift
Photo credit: etsy.com/shop/succulentsgalore


Instead of decorating with flowers or fruits/veggies that are normally on the center of the table, I think it's super cute when succulents deck the halls instead. I think mini cactus make great accents for the fall -- especially with all of their subtle color variations. I've noticed succulent bouquets are also becoming more popular as alternatives to traditional floral bouquets. Here are some simple decorative ideas using mini cactus that I love:


Photo credit: cupcakesandcashmere.com

Concept by: Cupcakes and Cashmere

You will Need:
Elongated tray
Succulent plants
Strip of burlap
Cranberries

______________________________________________

Photo credit: firstcomeflowers.typepad.com

Concept from: First Come Flowers

You will need:
Goblets
Top soil
Succulent plants

______________________________________________


Photo credit: allrainydaysarentgray.com 

Concept from: All Rainy Days Aren't Gray

You will need:
Ceramic mini potters
Mini succulent plants
Pebbles

______________________________________________

Succulent Centerpiece, Rustic, Great For Weddings, Cocktail Parties And Other Special Events, Housewarming Gift
Photo credit: etsy.com/shop/succulentsgalore

Concept from: Succulents Galore

You will need:
Small or medium wooden crate
Brown paper
Succulent plants

______________________________________________

Succulent Centerpiece, Rustic, Great For Weddings, Cocktail Parties And Other Special Events, Housewarming Gift
Photo credit: etsy.com/shop/succulentsgalore

Concept from: Succulents Galore

You will need:
Small tin buckets
Succulent Plants

August 31, 2012

In Love with Mint Green


This may be my new favorite color for now. For medium to darker skin tones, mint green makes for a really pretty and soft contrast. For lighter skin, this shade of green may not have the same effect -- but it's still a nice color to have around if not to wear. I feel like mint is the green version of robin egg blue which seems to be HUGE this summer. Being more of an earthy type in general, I've always gravitated to greens over cooler blue shades. Mint green is also a good color for transitioning from Summer to Fall. Cooler and calmer than Summer neons but not quite Thanksgiving colors, either. Love it. 


1. Star Quality Flouncy Skirt -- $27.90 at shopgarageonline.com
2. China Glaze Up & Away Re-Fresh Mint Nail Lacquer -- $3.85 at mbeautylounge.com
3. 5 Pocket Slim Fit Pants -- $24.95 at hm.com/us/product
4. ASOS Pastel Jelly Watch -- $32.23 at us.asos.com
5. Mint Green Woman's Wedges -- $69 at toms.com

August 30, 2012

21 Cupcakes

Happy Birthday to me! Finally 21 years have gone by. One more year of school until I'm forced to become a real adult. A little scary, but a lot exciting. And worth having a cupcake or two to celebrate. Here are 21 adorable cupcake concepts that I'll have to attempt making for future birthdays to come:

1. 
kitchenmusings.com


2. 
life360.com


3. 
familyfun.go.com 


4. 
susanmagnolia.com


5. 
ajummaspad.blogspot.com


6. 
boingboing.net


7. 
partycupcakeideas.com


8. 
foodnetworktv.com


9. 

jawaexpress.com


10.   
opensourcefood.com


11. 
weheartit.com


12. 
sheknows.com


13. 
birdsandbaking.wordpress.com


14. 
dollhousejeans.blogspot.com

15. 
theendearingdesigner.com


16. 
weddingbycolor.com


17. 
elizabethannedesigns.com


18. 
catchingfireflies.typepad.com


19. 
siftdesserts.blogspot.com


20.


21.

babybanter.sheknows.com


And one for good luck: