December 31, 2011

Time For a New Calendar

Cover Photo
Photo credit: Leo D. Redmond


Every New Year my family always receives a Peace Corps calendar in the mail. My mom volunteered in West Africa for two years after college. That's actually when and where she met my dad. Besides from my mom, I've met a few ex Peace Corps volunteers who really valued the experience. I'm still contemplating whether or not to join myself later on.  I always love looking through all the calendar images. People send in original photographs from all over the globe. I'm pretty sure anyone is eligible to submit a photo for possible inclusion in future calendars as long as the image is from a country where past or present Peace Corps volunteers have served.


A few of my favorite calendar photos:


FebruaryNiger

"Tiny bush encampment of Tagaye near Abalak"
Photo credit: Crystal Pilon, Peace Corps Volunteer


March: Moldova 

Photo credit: Leo D. Redmond, Peace Corps Volunteer


April: Ecuador


Photo credit: Lisa Benitez


July: The Congo

Photo credit: Mary Crave


November: Ukraine

Photo credit: Yuriy Chernevyy


For more info on ordering your own international calendar or submitting original photos for consideration, visit the Returned Peace Corps Volunteers International Calendar website, where you can also find foreign recipes, music and films.

Happy New Year's Eve!

-doe

December 30, 2011

Big Hair and Big Voices

Photo credit: sevim.webs.com

Is it just me or does it seem like there are more and more emerging artists with BIG CURLY hair over the past few years? It could just be me, but either way, I love it! Maybe I should pull it together with my songwriting/guitar playing (and 'fro) and join in on this trend. Except, I need a couple of years for my TWA to catch up to these musicians' curls, and probably a few decades for my song writing abilities to catch up, too. Here are three musicians with impressive hair and music (in no particular order), all worth hearing if you haven't yet!

One: Andy Allo


If you haven't heard Andy Allo's music, she's got a soft and sweet sound. This could be an off description, but her music reminds me of a cross between soul and Nora Jones. If you're into relaxing music, you will probably love her voice. I recently realized that she is part Cameroonian, like me, which is kind of neat. I don't meet or hear of Cameroonians often except at family gatherings (where there is always a ton of us!). I guess she decided to rep the home land and create a dance she calls "the Cameroon." This had me laughing. It wouldn't be as funny if Cameroonians didn't actually dance like that, but they do! Check out her moves in her video below.


______________________________________________________________________________________________________


Two: Esperanza Spalding


Esperanza Spalding surprised me with her style of music when I first heard it. Very jazzy, bluesy and instrumental. She has a beautifully crisp voice, but I would guess her main focus is on the instrumental aspect of her music. She seems to be intimately connected with her instruments which I think shines through heavily in her songs. It seems as though many people agree that she is extremely talented -- she was the 2011 Grammy Award Winner for Best New Artist. One of my favorites that I've heard so far is "Little Fly." It's actually a poem by William Blake that she transformed into song. I read a lot of Blake in a poetry class I took a couple semesters ago -- my instructor loved him. So, for me, it's pretty interesting to hear the work of a familiar literary artist translated by a musical artist. You can watch her "Little Fly" music video below.


______________________________________________________________________________________________________


Three: Elle Varner


Elle Varner's single "Only Wanna Give It To You" featuring J. Cole  is probably her most popular song at this point -- that's the first I heard at least. She's been around for a while, but I don't think she gets as much recognition as she deserves. Her music could fit in easily with the mainstream, catching everyone's interest, but her voice still has an original flare that sets her apart. It's got that Lauren Hill edginess to it and besides her voice, I also just like the melodies themselves that she comes up with. My favorite of her songs so far is probably "So Fly," I like both its message and sound. Safe in the Streetz caught some footage of her performing live and you can hear her raw talent. They asked her a couple interview questions about safe sex and you can tell she's a pretty down-to-earth, REAL person from her responses. She talks a little about the hypersexualized female vocalists that the media is normalizing and how she veers away from that image, which I think is a good thing. As she said herself, she keeps her clothes on! You can hear what else she has to say in the full interview below.


-doe

December 29, 2011

My New Hair Regimen


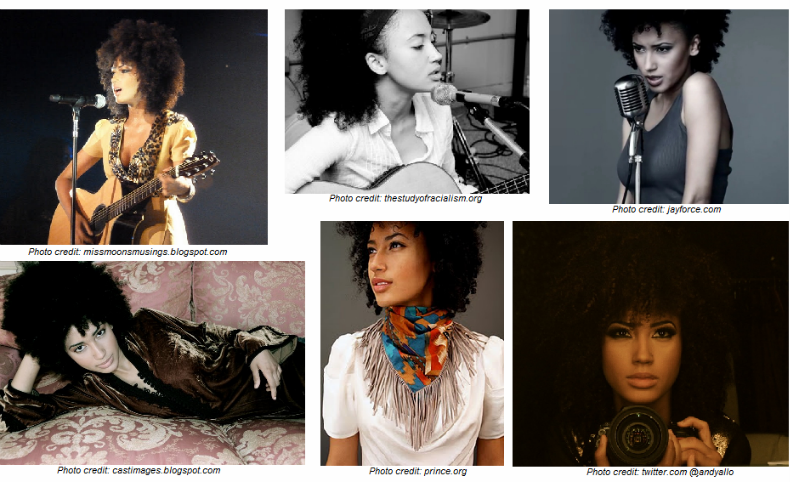
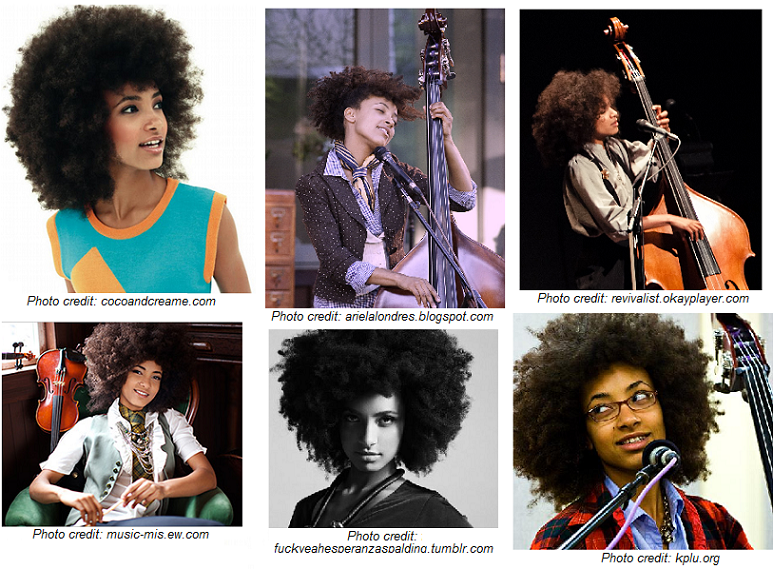
I've noticed that most napturals have pretty tried and true hair regimens that work best for them, so I think it's about time I came up with one for myself. I've never really had a routine when it comes to my hair. Instead, I usually try new products and switch things up often. Especially when I used to texturize my hair, every month it seemed like I had different hair on my head that responded differently to different treatment, so I was always trying to keep up with it. Now that my hair is going to remain the same texture for a long time -- well, probably forever -- I'm working towards finding a regimen that I can stick with so I won't have to be such a product junkie. I don't have any issues with people excessively trying new products. I think it's just a hobby like anything else could be, but for the sake of practicality and convenience, I think discovering a hair-care routine that works best for your hair is a good thing. So I'm going to try to stick to these products until the bottles run out, at least.

Maybe the product combo I've come up with isn't the best since I'm literally mixing different products at every stage.  I think most people advise using one line of products in order to get the best results, but so far, my product medley has been working. My hair is still short, so styling products don't matter all that much. I'm mostly concerned with keeping my hair HEALTHY, moisturized and clean to promote hair growth. Admittedly, I cheat and use curling irons every now and then, so I also try to be careful about moisturizing my hair as to avoid heat damage, and I never use my curling iron on its highest setting. After going through the effort of chopping off nearly all of my hair in order to get rid of damage, it would be silly to just damage it all again.


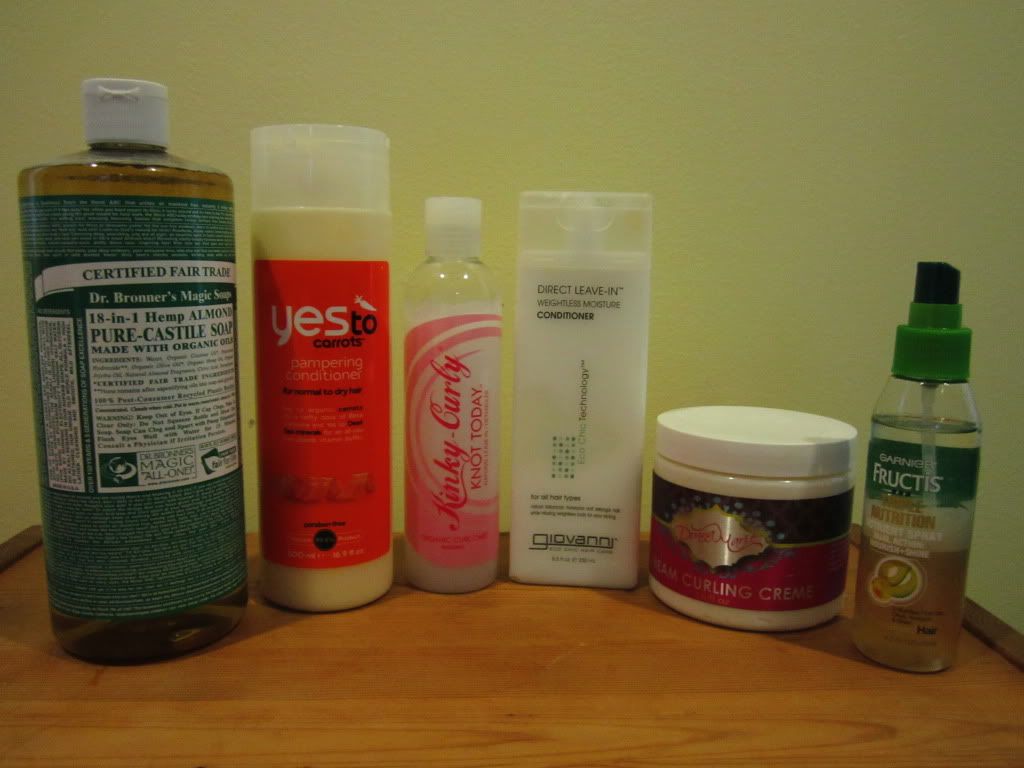
What I've Recently been using in order of how I use them (will probably change sooner than later):

32oz, $16.99 at Target
16oz, $10.49 at Target
First, 
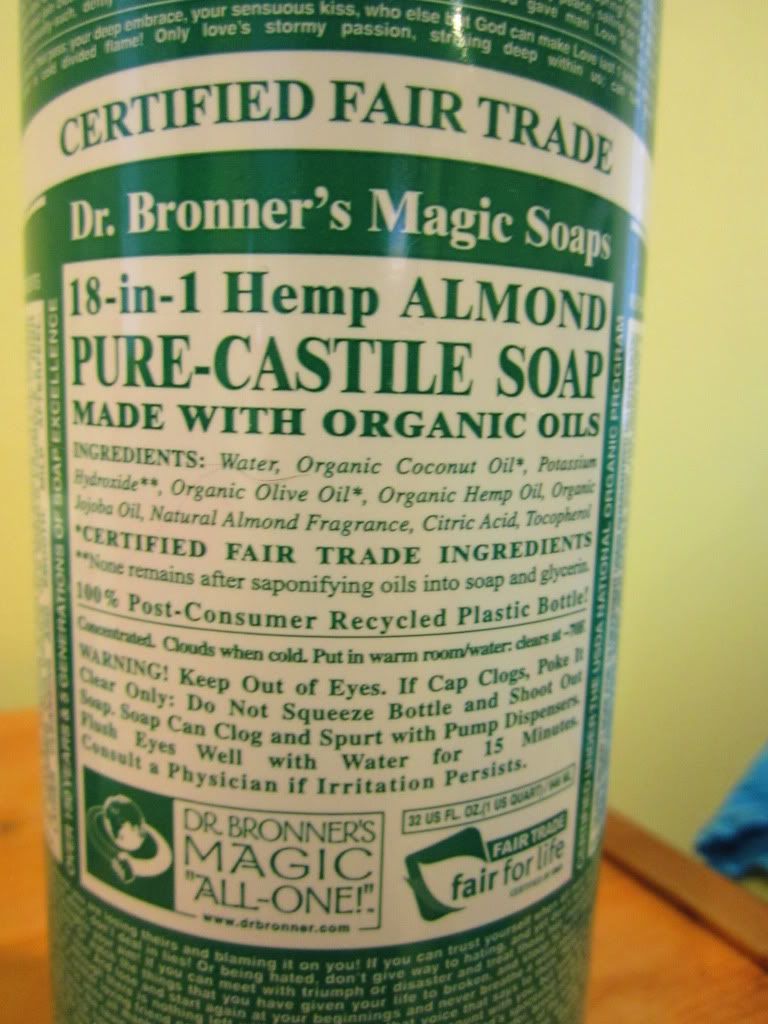
I shampoo my hair using Dr. Bronner's Magic Soaps. These are Castile soaps, or put more simply, vegetable oil based soaps (as opposed to animal oil based). Other brands make Castile soaps also, but this particular brand caught my eye mostly because it was the only one I saw and also because it came in many scents, including almond, and I LOVE the smell of almond extract. So. Good. A little bit of this soap goes a long way. It has a very rich but very soft lather (mostly because of the high coconut oil content) that leaves my hair feeling squeaky clean, but not necessarily stripped. I definitely would NOT skip conditioning after using this shampoo, however. Even though it has many enriching oils, it does leave my hair feeling a bit stringy and not very smooth. It is a sudsy shampoo, though, so that's to be expected. I don't mind the feel because I only shampoo once or twice a week usually and I always condition afterwards. This bottle is also good because you can use castile soap for nearly EVERYTHING, laundry, brushing your teeth, washing your car, cleaning the house, as body wash, for bathing pets...everything.

Ingredients: H2O, Organic coconut oil, Potassium hydroxide, Organic olive oil, Organic hemp oil, Organic jojoba oil, Almond fragrance, Citric acid, Tocopherol


16.9oz, $8.99 at Target
After cleansing my hair, 
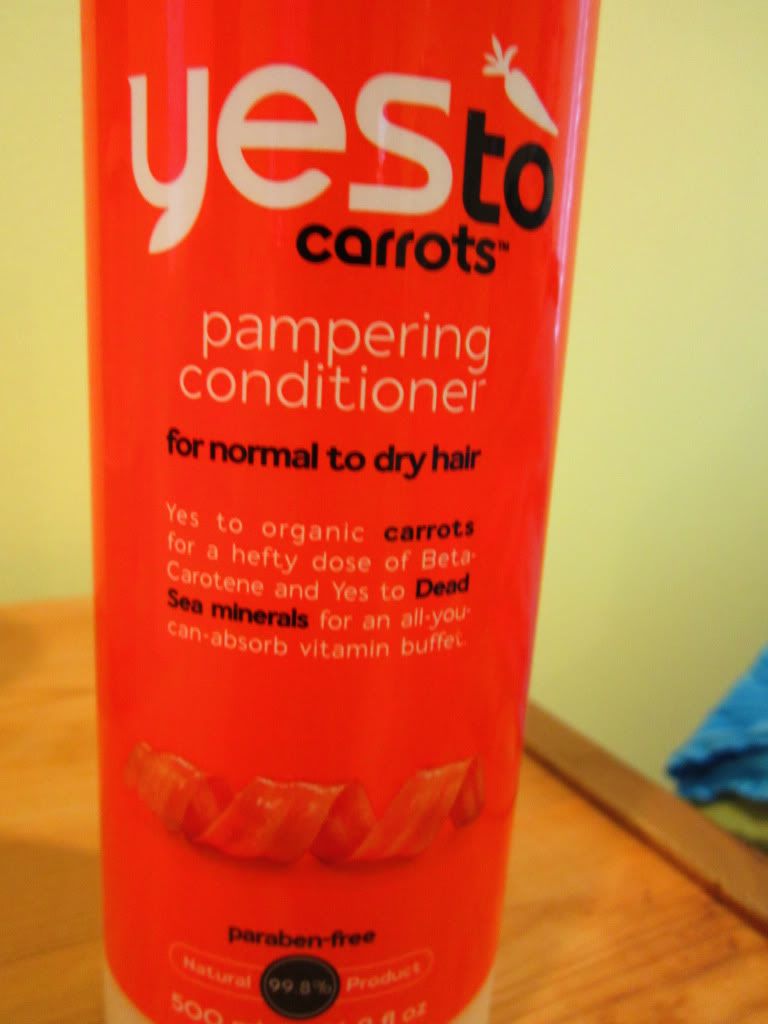
I condition with Yes to Carrots Pampering Conditioner. A friend of mine recommended this product to me and I agree with her -- it's a super silky conditioner. My mom actually gave me two bottles of this stuff, so I will be using it for a while. It's not bad for detangling, the slip I'd say is pretty good. After leaving this in for a few minutes, it's not hard at all to get my wide toothed comb through tangles. After rinsing out, I reapply a coin size amount to my hair, work it through, and leave it in. It contains no paraben, no petroleum, and no SLS (Sodium Lauryl Sulfate). Good stuff. It does contain a handful of chemical sounding ingredients that I have never heard of, but the product line garantees that it contains 99.8% natural products, so I'm assuming they are just complicated terminologies for simple things, or if they are chemicals, they are probably less harsh than those you would find in ordinary hair products.

Ingredients: H2O, Cetearyl alcohol, Behentrimonium chloride, Cetyl esters, Carrot juice, Carrot seet oil, Dead sea water, Dead sea silt extract, Organic matricaria flower oil, Olive fruit oil, Sweet almond oil, Marigold seed oil, Pumpkin fruit extract, Sweet potato extract, Melon fruit extract, Jojoba seed oil, Wheat germ oil, Orange fruit extract, Honey extract, Pomegranate extract, Guar hydroxypropyltrimonium chloride, Fragrance, Sodium hydroxide, Sodium Benzoate, Potassium sorbate


8oz, $11.99 at Target
After combing through my hair and washing out the conditioner, 
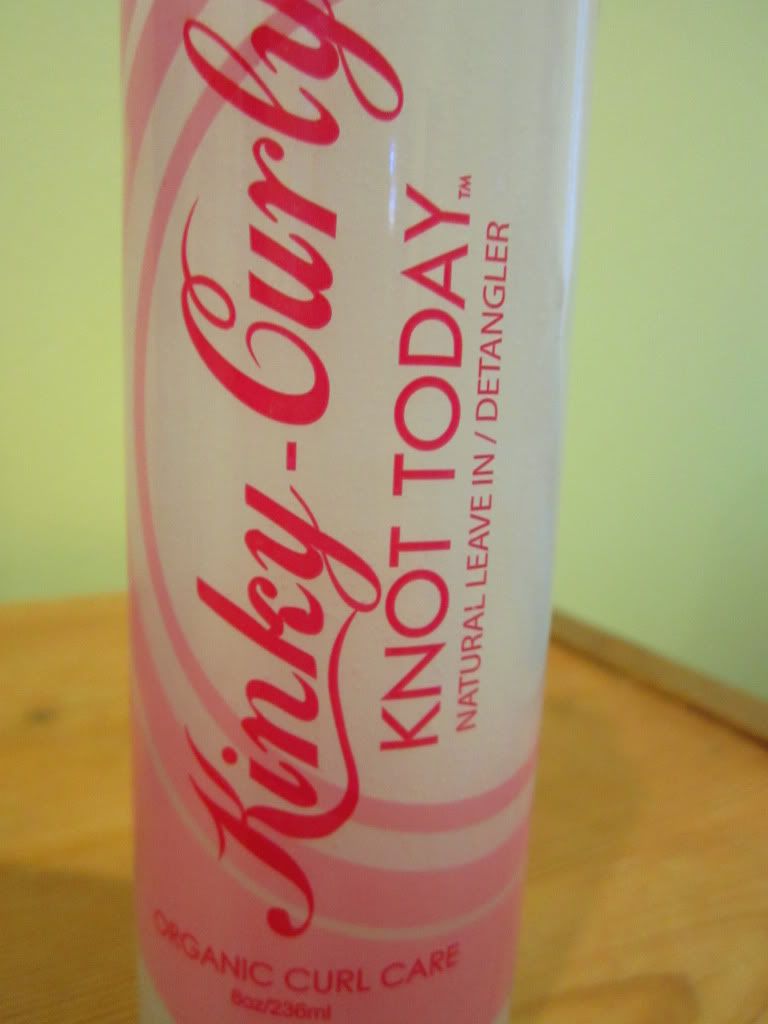
I apply a small amount of Kinky Curly Knot Today Natural Leave In/Detangler. I comb it through using a wide tooth comb for even distribution and also just to further detangle. This stuff also prevents the hair from becoming stiff or crunchy later on if you're going to use gel products. I don't use a lot of this as a leave in, I mostly just use it as a detangler. As a leave in, it's not my favorite because I prefer creamier moisturizers for my hair, but it definitely works well for running a comb through tight curls. I could probably skip this step but my mom gave me 2 bottles of this stuff...so I figured I might as well include it in the hair routine.

Ingredients: Organic mango fruit extract, Organic slippery elm, Organic marshmallow root, Organic lemongrass, Cetyl alcohol, Behentrimonium methosulfate, citric acid, phenoxyethanol, natural fragrance.


8.5oz, around $8 at Target
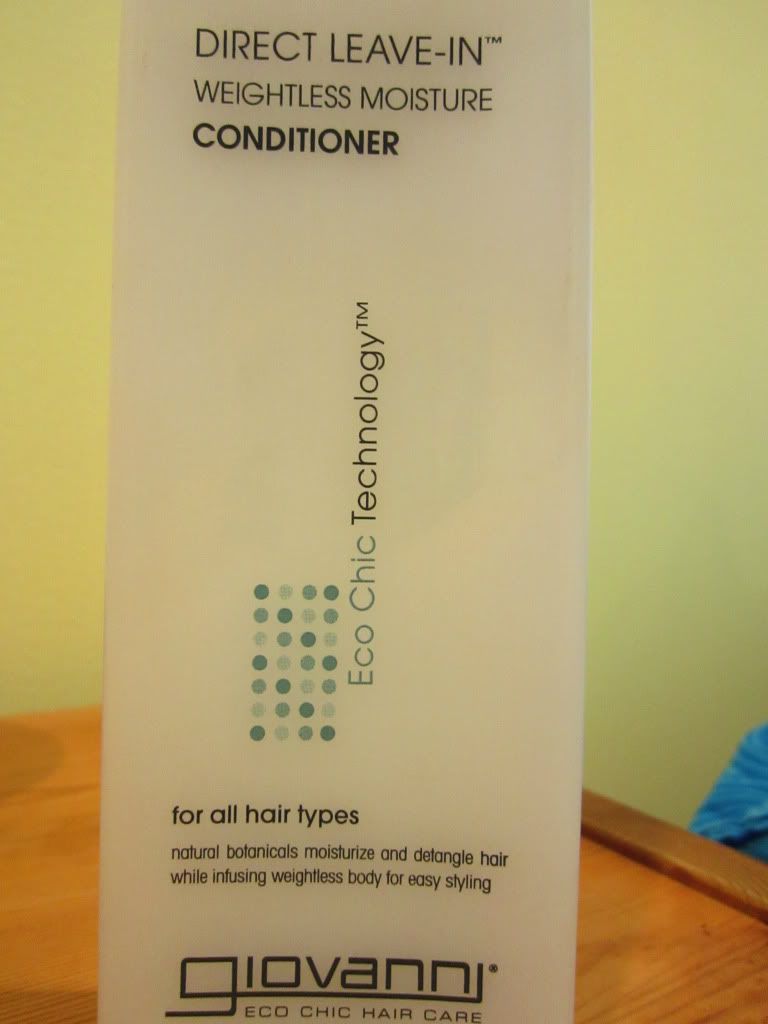
For a daily leave in, I use the Giovanni Direct Leave-In Weightless Moisture Conditioner. This moisturizer seems thicker and creamier than the Kinky Curly Knot today. It is also a bit heavier so I feel like it helps weigh my curls down a little which helps add length. It's still fairly light weight though so I usually moisturize my hair with a small amount of this stuff every morning to help protect my ends and add elasticity. It's got a fairly mild smell too so its scent is not so overpowering/in my face either. I apply this after detangling my hair and before applying any curling creams or oils.

Ingredients: Purified H2O, Aloe Vera leaf juice, Sunflower seed oil, Soybean seed extract, Birch extract, Mallow extract, Yarrow extract, Matricaria flower extract, Horsetail plant extract, Lavender extract, Rosemary leaf extract, Clary extract, Thyme extract, Coltsfoot flower extract, Nettle extract, Grapefruit extract, Cetyl Alcohol, Vitamin E, Pro-Vitamin B5, Citric Acid, Phenoxyethanol, Natural fragrance.


16oz, $18 at shopdonnamarie.com
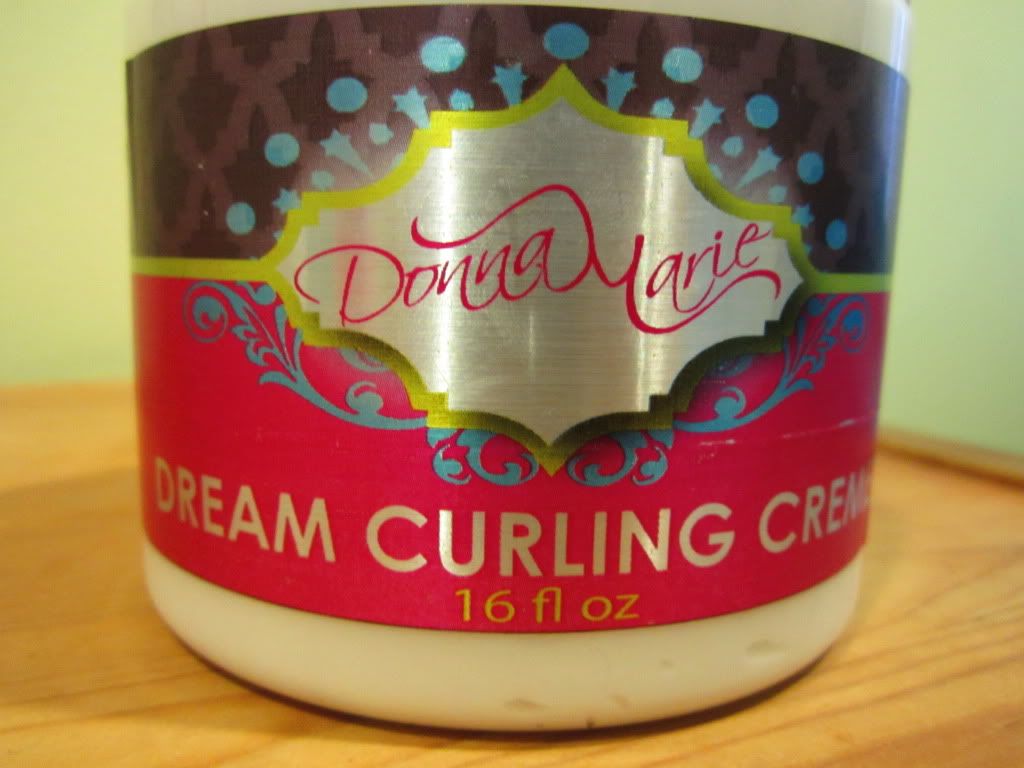
After moisturizing, I apply the Donna Marie Dream Curling Cream throughout my hair and gently comb it through for even distribution. I have yet to try this product on dry hair, but I know it works pretty well on wet hair. I chose this product because of its good reviews and because I am looking for a non sticky, non flaky, soft hold. No crunchiness. So far, I've gotten good results. I usually diffuse my hair dry just because I get impatient walking around with wet hair -- especially in Winter Michigan weather.

Ingredients: H2O, Aloe infused with rosemary, horsetail and hibiscus, Vegetable glycerin, Sweet almond oil, Sorbitol, Silk amino acids, Shea butter, Macadamia butter, Cupuacu butter, Agave nectar, Carbomer, Polysorbate 60, Xanthan gum, Phenoxythanol, Sorbic acid, Caprylyl glycol, Fragrance.


4.2oz, around $5 at Target
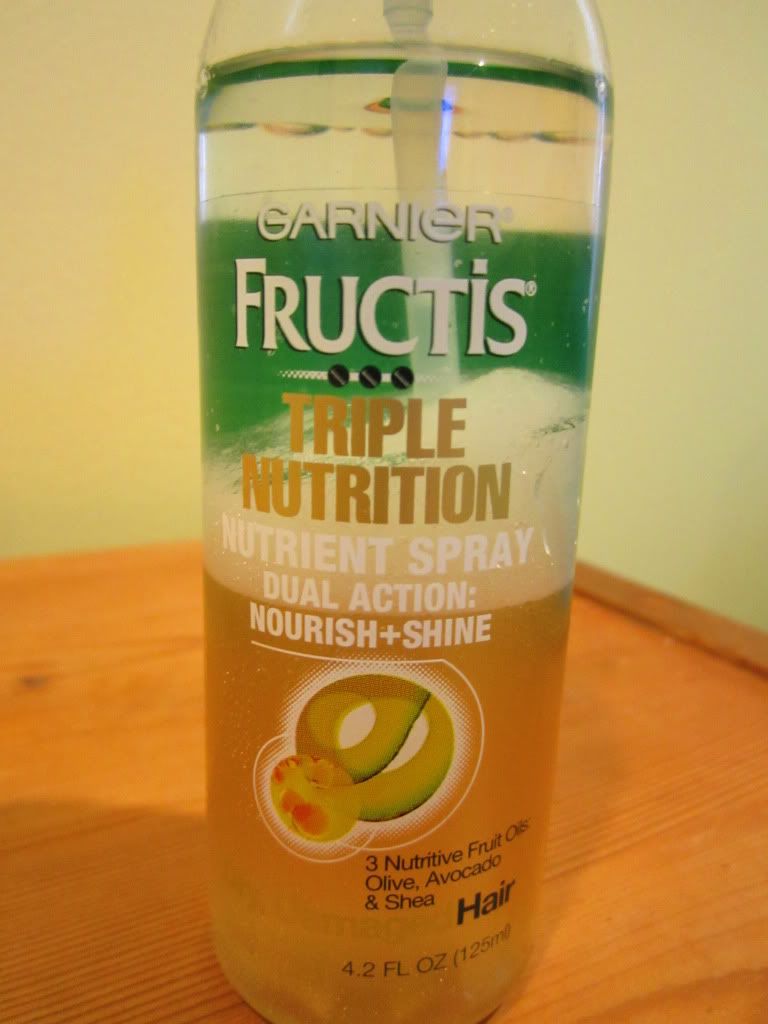
After applying the curl cream, I spray Garnier Fructis Triple Nutrition Nutrient Spray evenly on my hair. As seen in the picture, this product is both water and oil based so you have to shake it before each use so that the water and oil can mix. This leaves the hair shiny and extra soft while sealing in moisture with its olive, avocado and shea oils. I could probably skip this step, but with my hair, added moisture is always better, my hair eats up oils fast. I like that it has a spray nozzle because it makes the application easier. I have a jar of coconut oil that I also like as a sealant, but I have to heat it in order to liquefy it first, so out of laziness, I rarely use it.

Ingredients: Actually, now that I'm reading over this, there is a lot of chemicals at the beginning of the list and all the good ingredients are at the end of the list, meaning in smaller amounts. So, for naturals, maybe this isn't the best product for long term results. I will admit, it does leave my hair immediately soft, but I will stay on the lookout for a natural, easy application oil for my hair with less chemicals.


My results directly after washing, applying products, diffusing, and stretching my curls:


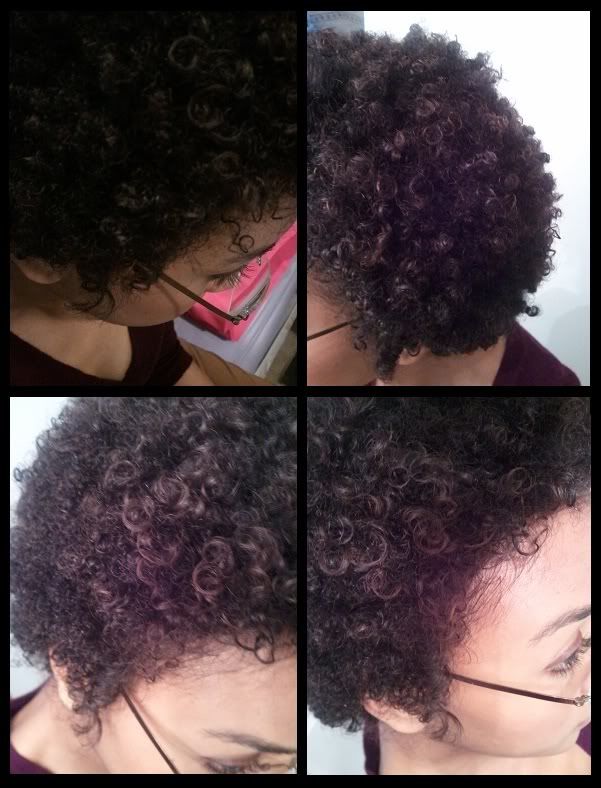
A little bit of frizz on the sides, but not so bad

I've washed my hair a couple times since I've started and so far it's working okay. I'll have to keep it up for at least a month to see the long term results and see what steps I could add or do without. Since the Donna Marie is so creamy, and has a light hold, using less moisturizer may give better results and stronger hold which I think I will do from now on so my curls will last longer. I'll probably see if the Donna Marie holds better when air dried and when applied on dry hair as well, and post those pictures later. 

-doe

December 28, 2011

iSpy Magazine: Street Fashion

Photo credit: mispymag.com

Before the start of winter break when I was back in Ann Arbor, I ran into my cousin and a couple of her friends in Espresso Royal (one of many life sustaining sources on campus). I guess a writer/photographer was walking by and saw us through the window. She came inside to ask if she could take our pictures for iSpy Magazine. They're doing a series of street fashion blurbs I guess, and our hair pieces caught her eye. I was being experimental that day and was trying out my silky head scarf I found at Salvation Army. My cousin had been wearing a floral head band she made herself with fabric and hot glue. The photographer caught us off guard because we were in the middle of a study cram session pretty much and looking presentable was the last thing on our minds, but we agreed to be photographed...because we figured why not. Above is the image that iSpy featured on their site. This particular blurb was admiring the color mustard yellow during the Winter season. I agree -- it's a nice color to spruce up any look on any day, really. Mustard yellow can brighten up the icey days and can add sunshine to already sunny days as well. 

-doe

December 23, 2011

DIY: Homemade Ornaments (From Scratch!)


Watson, my terror of a puppy, decided to pee/chew/destroy in every canine way possible most of my family's Christmas ornaments. My mom made an emergency run to the dollar store where she bought a handful of just okay ornaments, but also made a handful of her own. They turned out really nice! I asked her how she made them so I could try making some myself and was surprised by the extremely simple recipe -- yes, there is an ornament recipe. The little Santa, snowman, tree, cat (a tribute to my other terror animal named Samson), mouse and Christmas house seen above are all made out of a simple dough, just flour, salt and water. I realized they make good gifts, too, and they are very inexpensive to make. A little dough goes a long way. For people who are more difficult to shop for, and who enjoy decorating, a set of home made Christmas ornaments could be a good gift solution. 


What you will need

For dough:
1 cup flour
1/2 cup salt
1/2 cup water
~
For decorating:
Mod Podge or any acrylic finish
paint
brushes (small tips are best!)
A quick drying glue with strong hold
String or wire
Whatever else you think may add a dazzling touch


Directions


1. Mix together the dough. It works best to knead it with your hands. It's going to be a thick consistency similar to Play-Dough. 


2. Set up a mess-friendly work station because you WILL be making a mess. First it will be sculpting, then it will be painting. As you can see, my brushes weren't the greatest because I got them at CVS. I happened to have a tiny tipped brush that I got at an art supply store on campus though which worked great for painting details later on. If you don't have thin brushes, try using tooth picks or wires for small details.


3. Mold fun shapes! Try not to go too thin, because the thin pieces are most susceptible to cracking and breaking. If you are attatching smaller peices onto larger bases, try adding a drop or two of water to the area you want to attatch to. Water acts kind of like a glue -- not too much water though, or the figure will lose its shape. As you can see, me and my boyfriend who helped, got pretty silly creative. 


4. Bake at 250 degrees for 30 minutes to an hour or until hard. I baked mine for about 45 minutes because my mom suggested baking them for 1-2 hours. I found 45 minutes to be too long. As you can see, some of the figures started burning and when the dough burns, it becomes crumbly and much weaker. It could have been because my oven is extrememly tempermental and who knows if the dial is even at all indicative of its actual temperature. Just to be safe, even if you're working with a normal oven, I would say check them after a half hour. You want them to be completely moisture free and hard surfaced. If they end up being a little soft still, just put them back in the oven a little longer, but don't let them burn!


5. Now have fun and paint, glitter, decoupage even, and do whatever you want to make your ornaments look the way you please. I kept it simple and bought CHEAP "craft paint" from Meijer for literally 75 cents each. I found the cheap paints to be horrible at blending, it was impossible to make any vibrant secondary colors like green, but I was kind of okay with that because it created a more antique, vintage look. After the paint dried, I just Mod Podged a layer over it to give it that glossy finish. Glue a loop of string or wire to the back and there you have it, a finished ornament. Another option, instead of string, would be to insert a paper clip into the back of each figure while they are still doughy and before you bake them. Then the metal clips will act as hangers. I forgot that step, so I just used strings which work fine, too. 

(The puppy who destroyed the old and inspired the new.)


-doe

December 15, 2011

Impressive Treats for the Holidays

I haven't gotten around to doing much baking yet this holiday season, but Christmas is around the corner and it's the perfect excuse for creating zillions of holiday sweats -- and also an excuse to eat them all, too. I helped my cousin and her friend bake cookies yesterday which inspired me to do some recipe hunting. Here are my favorites of all the recipes I have found (so far). Enjoy!


Photo Credit: wollowbirdbaking.com

Oreo Truffle Snowmen
Recipe By: Willow Bird Baking

Ingredients:
2 packages golden oreo cookies 
2 8-ounce package cream cheese (softened)
white candy coating or candy melts

Decorations:
multicolored or chocolate sprinkles
candy-coated chocolate kiss sprinkles
strawberry fruit roll ups (or fruit by the foot)
chocolate (for melting)

Directions
1. Finely crush all but 14 cookies in a food processor or place them in a ziploc bag and crush into a fine consistency. Note: As for the extra 14 cookies, just eat them. Or, if you have extra dipping chocolate, make some chocolate covered oreos.

2. Stir in softened cream cheese. Use the back of a large spoon to help mash the two together.

3. Roll the mixture into 2″ balls (for the bodies) and 1″ balls (for the heads) and place on a cookie sheet covered with wax paper. Make sure you have enough heads for your bodies!

5. It helps to put the uncoated balls in the freezer for a few minutes to keep the mixture from starting to fall apart when you drop into the melted chocolate. Note: I refrigerate mine for an hour or two in lieu of the freezer. I’ve heard folks say that if they get too cold, they can crack.
6. Melt candy coating as directed on package and then dip balls one at a time into candy coating. Let excess coating drain off onto wax paper covered cookie sheet to dry. Note: Dipping is often the most difficult part. Find what works for you. Let your kitchen be your playground. Look through your utensils for useful tools, and be creative. I used a grill fork to hold my “bodies” while spooning coating over them, and then redipped the bottoms separately. For the heads, I usually skewered them with a toothpick, dipped them, and then wriggled them off onto the wax paper after draining excess coating.
7. As soon as each body and head is dry (which usually only takes a couple of minutes) transfer it to the refrigerator immediately to prevent cracking/oozing. If it does crack, blot with a paper towel, redip, dry, and then refrigerate. 

Decorating

1. Take a head and body out of the fridge, and “glue” them together using melted candy coating (I used a sharp paring knife here to whittle away some of the excess coating around the bottom of the heads).
2. Use melted coating to “glue” on chocolate sprinkles for eyes, mouth, and buttons if desired. “Glue” on an orange candy-coated chocolate sprinkle (or a regular orange sprinkle) for a carrot nose.
3. Cut a strip of strawberry fruit roll up, and snip “fringe” into each end. Wrap around snowman’s neck and “glue” together with melted candy coating.
4. Melt chocolate and pipe out tree branch arms. Using a bamboo skewer or a toothpick, carve out a hole in each side of the snowman. Gently slide a “branch” into each hole to serve as arms.
4. Refrigerate snowmen in an airtight container.

Photo Credit: marthastewart.com 

Black Bottom Coconut Bars
Recipe By: Martha Stewart

Ingredients
For Chocolate Base:
    • 1/2 cup (1 stick) unsalted butter, plus more for pan
    • 1/2 cup sugar
    • 1/4 teaspoon salt
    • 1 large egg
    • 1/4 cup unsweetened cocoa powder
    • 1/4 cup all-purpose flour (spooned and leveled)
  • For Coconut Topping:

    • 2 large eggs
    • 3/4 cup sugar
    • 1/2 teaspoon vanilla extract
    • 1 cup all-purpose flour, (spooned and leveled)
    • 1 package sweetened shredded coconut (7 ounces), 1/2 cup reserved for sprinkling

    • Directions
    • 1. For chocolate base: Preheat oven to 375 degrees. Line a 9-inch square baking pan with aluminum foil, leaving a slight overhang; butter bottom and sides of foil (not overhang).
    • 2. Place butter in a large microwave-safe bowl; melt in microwave. Add sugar and salt; whisk to combine. Whisk in egg, then cocoa and flour until smooth. Spread batter in prepared pan.
    • 3. Bake just until sides begin to pull away from edges of pan, 10 to 15 minutes (do not overbake). Let cool slightly while preparing coconut topping. Keep oven on for topping
    • 4. For coconut topping: In a medium bowl, whisk eggs with sugar and vanilla. Gently mix in flour and coconut (except 1/2 cup reserved for sprinkling).
    • 5. Drop mounds of mixture over chocolate base; spread and pat in gently and evenly with moistened fingers. Sprinkle with reserved 1/2 cup coconut.
    • 6. Bake until golden and a toothpick inserted in center comes out with moist crumbs attached, 25 to 30 minutes. Cool completely in pan. Lift cake from pan, peel off foil, and cut into 24 bars.


    Photo Credit: imsofunny.blogspot.com

    Holly Wreath Cookies
    Recipe By: My Life as a Domestic Artist

    Ingredients
    1 Cube Real Butter
    1 Bag Large Marshmallows
    1/2 tsp Vanilla Extract
    1/2 tsp Almond Extract
    6 cups corn flakes
    Lots of green food coloring
    Red Hots if desired

    Directions
    First make sure you grease a few large pieces of wax paper prior to preparing cookies. We use Pam to spray the wax paper but mom always used butter or margarine.


    In a large stock pot melt the butter. Add marshmallows, vanilla and almond extracts and stir until all marshmallows are melted. Be careful to not burn the mixture. Remove from heat and add green food coloring to bring mixture to a forest green color. It takes quite a bit but it definately looks better than avacado green when you use just a little.


    When mixture is a good shade of green add the corn flakes. Fold the flakes into the mixture to avoid crushing the flakes. When flakes are sufficiently green scoop out approxiamtely 1 1/2 cups of flakes onto wax paper. Have kids rub their hands with butter and form the flakes into wreath shapes. Add red hots and let cool.


    Photo Credit: buddingbaketress.blogspot.com

    Peanut Butter Reindeer Cookies
    Recipe by: Baker Girl


    Ingredients:
    3/4 cup peanut butter
    1 1/4 cup firmly packed brown sugar
    1/2 cup shortening
    3 tablespoons milk
    1 tablespoon vanilla
    1 egg
    1 3/4 cup all-purpose flour
    3/4 teaspoon baking soda
    3/4 teaspoon salt
    Chocolate-covered mini pretzels
    Mini brown M&Ms
    Regular-sized red M&Ms


    Directions:

    Preheat oven to 375°F.

    Combine brown sugar, peanut butter, shortening, milk, and vanilla in large bowl. Beat at medium speed until well blended. Add egg; beat until just blended.

    In a separate bowl, combine flour, baking soda, and salt. Add to creamed mixture at low speed. Mix just until blended.

    Form dough into 1-inch balls. To make reindeer-shaped cookies, pinch the bottom of the ball slightly to form a point, then gently flatten with your hand. Space cookies about 2 inches apart on a greased cookie sheet and bake for 7 to 8 minutes, until set or just beginning to brown. 

    Remove from oven and immediately (and gently) press two mini pretzels into the tops of the cookies for the reindeer's antlers. Press two mini brown M&Ms in for the eyes and one red M&M for the nose (or any other color... some of mine ended up with green noses. They might be South Pole reindeer.). 

    Allow to cool 2 minutes on the baking sheet and then transfer to a wire rack or paper towel to cool completely. 

    Makes about 40 reindeer cookies.


-doe

December 14, 2011

Gift Guide: Nature Lovers


1. Fresh Balsam Scented Candle 2/$20 bathandbodyworks.com; 2. Bonsai tree  $14, urbanoutfitters.com; 3. Teak Measuring Spoons $20, merchant4.com; 4. Make Your Place: Affordable, Sustainable Nesting Skills by Raleigh Briggs, $6, etsy.com; 5. Organic Coil wooden bracelet, $160, gustavreyes.com; 6.10x Magnification Binoculars $29.95 brookstone.com; 7. Blue and White Ceramic Flower Pots by Fallen Fruits, 19.99 euros, gorgeousgifts.co.uk; 8. Paper making mold $35, arnoldgrummer.com; 9. Bubble Wall Mount Fish Tank, $19.44, amazon.com; 10. Kiss My Face biodegradable Peace Soaps, $9.99, target.com; 11. Seeded wrap boxes (will bloom if planted!) $1.84  flowerseedpaper.com


Some gift ideas for those green thumbed people in our lives who live day by day marveling their surroundings. Whether they are awe-stricken every time they step foot outside or they are environmentally conscious or they simply stuff their closets with the colors of the earth (or all of the above), it is very likely that they will enjoy these gifts. Almost everything is under $50 (except for the bracelet) which is a plus, too. I have a smaller one-wick version of the Fresh Balsam scented BBW candle -- it is my favorite of all of their winter/nature smelling candles. For small enough gifts, I think the seed paper is a great (and easy) way to wrap them. You can hide any lack of gift wrapping skills while being Earth friendly at the same time. Binoculars may seem random, but they are good for bird watching and nature walks and all those outdoorsy things. I'm not sure if the fish tank is considered nature loving or nature abuse...but I asked my cousin who is an Environmental Studies major what she thought about it and she gave it a positive reaction, so hopefully it's nature loving.


-doe

December 12, 2011

Holiday Wish List


The Little silly things that make me happy... 


1. Yes To Carrots Pampering Conditioner 
greendaddyshop.wordpress.com

2. Bitch Magazine
bitchmagazine.org

3. Donna Marie Curling Cream
britishcurlies.co.uk

4. Prisma Markers
artistcraftsman.com

5. Bust Magazine
bustboobtique.com

6. Mac Lipstick in Freckletone
musingsofamuse.com

7. Tagged Bouquet Journal
anthropology.com

8. Handmade Papers
flowerseedpaper.com

9. Kinky Curly Knot Today
amazon.com

10. Nars Blush in Exhibit A
narscosmetics.com


-doe

December 11, 2011

The SHEI Launch


SHEI Magazine held it's launch party event yesterday to promote the latest magazine. I hadn't seen any of the shoots until then so it was a surprise to see what the photo and layout team put together. This year the theme was "The Art Issue." I'm on the literature team for SHEI, so I knew about the theme already, I just hadn't seen what the other teams did with it. My pink article was in it, called "The Girl Color" - yay.


I feel like the theme seemed a little more morbid than simply "art" though, when considering the photo shoots. Especially the plastic surgery photo shoot. Lots of masked faces and kind of bloody imagery. I think maybe each art movement could have been it's own photo shoot or maybe instead of art movements they could have done art mediums...I guess the point was not to have the whole magazine be obviously about art. But, fashion and writing and photo and layout/graphic design are all already forms of art so I feel like if you're going to have a compilation of art labelled as an art issue maybe it does have to be extra obvious. But, maybe not. Either way, art issue or not, it still turned out great and there was a huge turn out at the event.


It took place at the art gallery on State St. The setting was perfect because of the display set up at the time.  It was a ton of work from U of M art students. All really neat stuff, extra vibrant and colorful and concepts way left field.

Here's what one of the shoots looked like. I think it may have been my favorite shoot. It was called paper dolls:


It was hard to get good photos of a lot of the works because of the massive crowd of people but here are some display pieces I liked:


Fun times!

-doe